Get started with Campaigns
Learn where things are in Campaigns and the first three things to do before you send an email.
Orbitly Campaigns is for sending marketing email to people who agreed to hear from you. You build the email, choose who gets it, send it or schedule it, and then see who opened and clicked.
Campaigns sends email only. WhatsApp and SMS show as Not available in Orbitly yet, and so do their report tabs.
Where things are
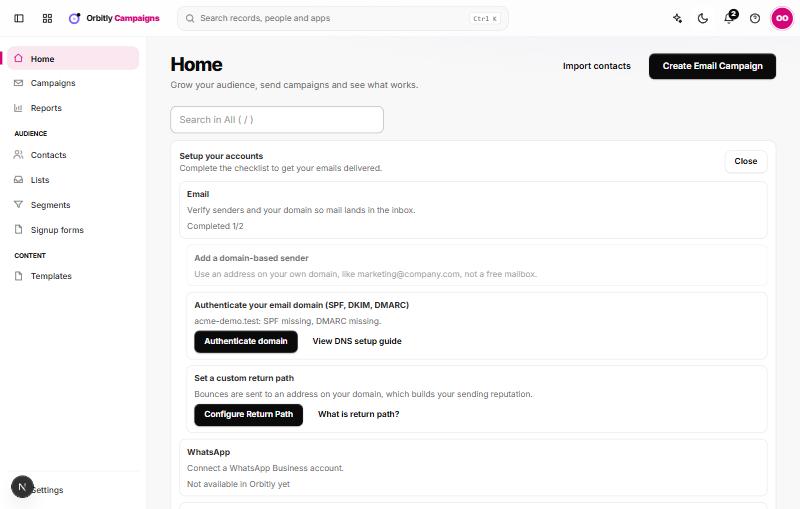
The sidebar has these pages:
- Home: your setup checklist, headline numbers and recent campaigns.
- Campaigns: every email you have created, with tabs All, Drafts, Scheduled, Sending and Sent.
- Reports: results for the period you choose.
- Contacts, Lists, Segments and Signup forms: your audience.
- Templates: starter designs and your own saved designs.
- Settings: your organisation details, senders, tracking, compliance and more.
Your first three steps
- Set your sender and postal address. Open Settings. Every marketing email must show who it is from and where you are, and Campaigns will not let you send without a postal address. See Authenticate your sending domain.
- Add contacts to a list. Create a list, then import people or share its signup page. See Import contacts and Create a list and share its signup page.
- Send your first campaign. Choose Create Email Campaign and follow the four steps. See Create and send an email campaign.
The Set up Campaigns panel on Home ticks these off as you go.
Who can do what
You need permission to edit to create campaigns and lists, and permission to send to send them. If you can prepare a campaign but not send it, ask an admin. See Roles and permissions.
Was this not what you needed? Contact support or search again.